
- Introduction
- KFP v2 Installation and Core Concepts
- Defining Components
- Authoring Pipelines
- Advanced Patterns
- CI/CD Integration
- What Compilation Actually Produces
- Submitting a Run and Reading It
- Running It End to End Once
- Components Are Far More Isolated Than You Think
- The Order to Read a Failed Run In
- Caching Is On by Default
- Control Flow and Platform Features Have Been Renamed
- When Not to Use KFP
- Conclusion
- References
- Quiz
Introduction
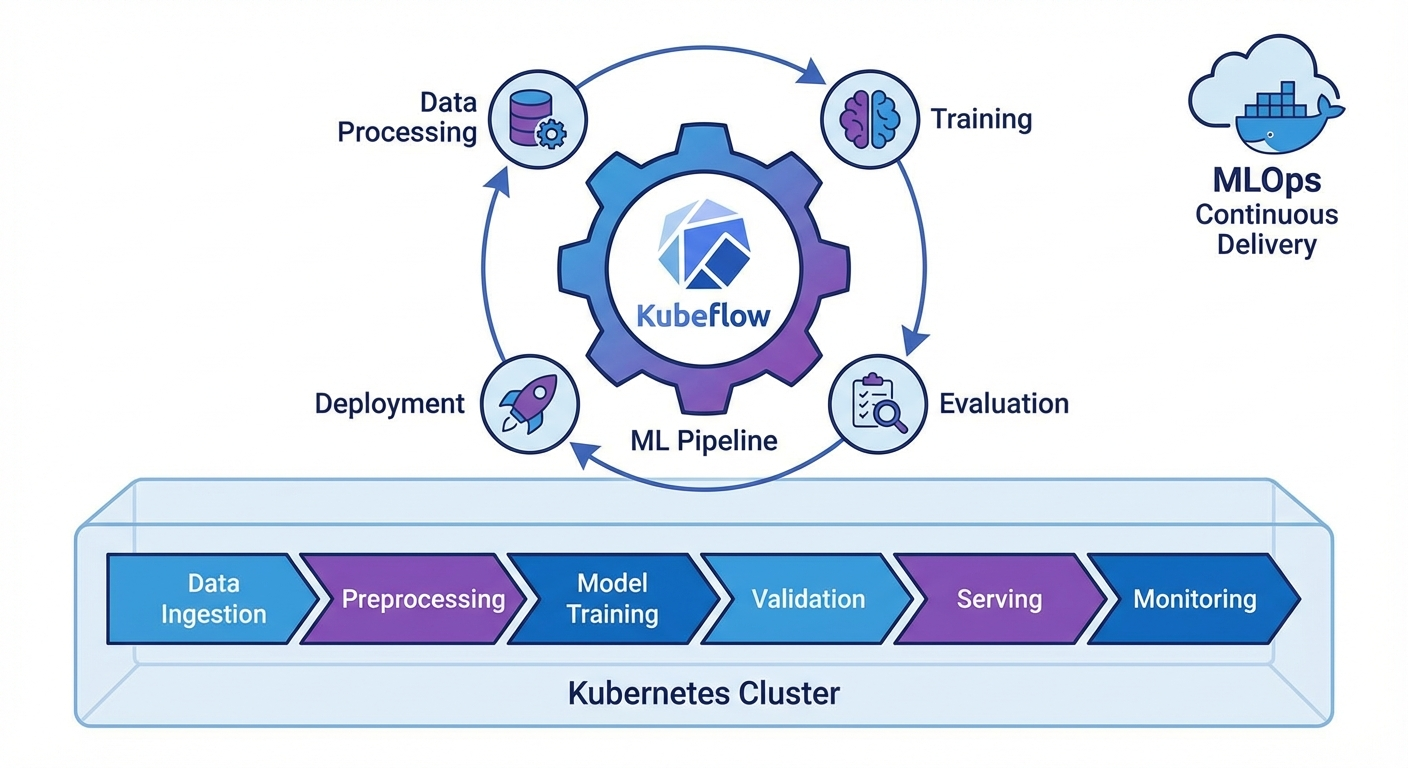
When moving ML models from experimentation to production, reproducibility, automation, and version management are essential. Kubeflow Pipelines (KFP) v2 is a framework for defining and running ML workflows on Kubernetes, allowing you to compose pipelines using nothing but Python decorators.
This article covers the core features of the KFP v2 SDK and hands-on pipeline construction.
KFP v2 Installation and Core Concepts
Installation
pip install kfp==2.7.0

# Install Kubeflow Pipelines backend (Kubernetes)
kubectl apply -k "github.com/kubeflow/pipelines/manifests/kustomize/env/platform-agnostic?ref=2.2.0"

# Port forwarding
kubectl port-forward svc/ml-pipeline-ui -n kubeflow 8080:80
Core Concepts
# 1. Component: A unit of work in the pipeline (Python function)
# 2. Pipeline: A DAG (Directed Acyclic Graph) of Components
# 3. Artifact: Input/output data (Dataset, Model, Metrics, etc.)
# 4. Run: A single execution of a pipeline
# 5. Experiment: A logical group of Runs
Defining Components
Lightweight Python Component
from kfp import dsl
from kfp.dsl import (
    Dataset, Input, Output, Model, Metrics,
    ClassificationMetrics, component
)


@dsl.component(
    base_image="python:3.11-slim",
    packages_to_install=["pandas==2.1.4", "scikit-learn==1.4.0"]
)
def load_data(
    dataset_url: str,
    output_dataset: Output[Dataset]
):
    """Data loading component"""
    import pandas as pd

    df = pd.read_csv(dataset_url)
    print(f"Loaded {len(df)} rows")

    # Save to output artifact
    df.to_csv(output_dataset.path, index=False)
    output_dataset.metadata["num_rows"] = len(df)
    output_dataset.metadata["num_columns"] = len(df.columns)


@dsl.component(
    base_image="python:3.11-slim",
    packages_to_install=["pandas==2.1.4", "scikit-learn==1.4.0"]
)
def preprocess_data(
    input_dataset: Input[Dataset],
    train_dataset: Output[Dataset],
    test_dataset: Output[Dataset],
    test_size: float = 0.2
):
    """Data preprocessing and splitting"""
    import pandas as pd
    from sklearn.model_selection import train_test_split

    df = pd.read_csv(input_dataset.path)

    # Preprocessing
    df = df.dropna()
    df = df.drop_duplicates()

    # Splitting
    train_df, test_df = train_test_split(df, test_size=test_size, random_state=42)

    train_df.to_csv(train_dataset.path, index=False)
    test_df.to_csv(test_dataset.path, index=False)

    train_dataset.metadata["num_rows"] = len(train_df)
    test_dataset.metadata["num_rows"] = len(test_df)


@dsl.component(
    base_image="python:3.11-slim",
    packages_to_install=[
        "pandas==2.1.4", "scikit-learn==1.4.0",
        "joblib==1.3.2", "xgboost==2.0.3"
    ]
)
def train_model(
    train_dataset: Input[Dataset],
    model_output: Output[Model],
    metrics_output: Output[Metrics],
    n_estimators: int = 100,
    max_depth: int = 6,
    learning_rate: float = 0.1
):
    """Model training"""
    import pandas as pd
    import joblib
    from xgboost import XGBClassifier
    from sklearn.model_selection import cross_val_score

    df = pd.read_csv(train_dataset.path)
    X = df.drop("target", axis=1)
    y = df["target"]

    # Training
    model = XGBClassifier(
        n_estimators=n_estimators,
        max_depth=max_depth,
        learning_rate=learning_rate,
        random_state=42
    )
    model.fit(X, y)

    # Cross-validation
    cv_scores = cross_val_score(model, X, y, cv=5, scoring="accuracy")

    # Save model
    joblib.dump(model, model_output.path)
    model_output.metadata["framework"] = "xgboost"
    model_output.metadata["n_estimators"] = n_estimators

    # Log metrics
    metrics_output.log_metric("cv_accuracy_mean", float(cv_scores.mean()))
    metrics_output.log_metric("cv_accuracy_std", float(cv_scores.std()))
    metrics_output.log_metric("n_estimators", n_estimators)


@dsl.component(
    base_image="python:3.11-slim",
    packages_to_install=[
        "pandas==2.1.4", "scikit-learn==1.4.0",
        "joblib==1.3.2", "xgboost==2.0.3"
    ]
)
def evaluate_model(
    test_dataset: Input[Dataset],
    model_input: Input[Model],
    metrics_output: Output[ClassificationMetrics],
    eval_metrics: Output[Metrics]
) -> float:
    """Model evaluation"""
    import pandas as pd
    import joblib
    from sklearn.metrics import accuracy_score, classification_report

    df = pd.read_csv(test_dataset.path)
    X = df.drop("target", axis=1)
    y = df["target"]

    model = joblib.load(model_input.path)
    y_pred = model.predict(X)
    y_prob = model.predict_proba(X)

    accuracy = accuracy_score(y, y_pred)

    # Classification metrics (Confusion Matrix visualization)
    metrics_output.log_confusion_matrix(
        categories=["Class 0", "Class 1"],
        matrix=[[int(sum((y == 0) & (y_pred == 0))), int(sum((y == 0) & (y_pred == 1)))],
                [int(sum((y == 1) & (y_pred == 0))), int(sum((y == 1) & (y_pred == 1)))]]
    )

    eval_metrics.log_metric("test_accuracy", accuracy)

    return accuracy
Custom Docker Image Component
@dsl.component(
    base_image="pytorch/pytorch:2.1.0-cuda12.1-cudnn8-runtime",
    packages_to_install=["transformers==4.37.0", "datasets==2.16.0"]
)
def finetune_llm(
    model_name: str,
    train_dataset: Input[Dataset],
    output_model: Output[Model],
    epochs: int = 3,
    batch_size: int = 8
):
    """LLM fine-tuning (GPU required)"""
    from transformers import AutoModelForSequenceClassification, Trainer
    # ... training code
    pass
Authoring Pipelines
Basic Pipeline
@dsl.pipeline(
    name="ML Training Pipeline",
    description="Data Load -> Preprocess -> Train -> Evaluate Pipeline"
)
def ml_training_pipeline(
    dataset_url: str = "https://example.com/data.csv",
    test_size: float = 0.2,
    n_estimators: int = 100,
    max_depth: int = 6,
    learning_rate: float = 0.1,
    accuracy_threshold: float = 0.85
):
    # Step 1: Load data
    load_task = load_data(dataset_url=dataset_url)

    # Step 2: Preprocess (runs after load_task completes)
    preprocess_task = preprocess_data(
        input_dataset=load_task.outputs["output_dataset"],
        test_size=test_size
    )

    # Step 3: Train model
    train_task = train_model(
        train_dataset=preprocess_task.outputs["train_dataset"],
        n_estimators=n_estimators,
        max_depth=max_depth,
        learning_rate=learning_rate
    )
    # Set resource limits
    train_task.set_cpu_limit("4")
    train_task.set_memory_limit("8Gi")

    # Step 4: Evaluate
    eval_task = evaluate_model(
        test_dataset=preprocess_task.outputs["test_dataset"],
        model_input=train_task.outputs["model_output"]
    )

    # Step 5: Conditional deployment
    with dsl.If(eval_task.output >= accuracy_threshold):
        deploy_task = deploy_model(
            model_input=train_task.outputs["model_output"],
            accuracy=eval_task.output
        )


@dsl.component(base_image="python:3.11-slim")
def deploy_model(
    model_input: Input[Model],
    accuracy: float
):
    """Deploy model (when conditions are met)"""
    print(f"Deploying model with accuracy: {accuracy:.4f}")
    print(f"Model path: {model_input.path}")
    # Actual deployment logic (K8s Serving, BentoML, etc.)
Pipeline Compilation and Execution
from kfp import compiler
from kfp.client import Client

# 1. Compile to YAML
compiler.Compiler().compile(
    pipeline_func=ml_training_pipeline,
    package_path="ml_pipeline.yaml"
)

# 2. Submit to KFP server
client = Client(host="http://localhost:8080")

# Create Experiment
experiment = client.create_experiment(name="ml-experiments")

# Execute Run
run = client.create_run_from_pipeline_func(
    ml_training_pipeline,
    experiment_name="ml-experiments",
    run_name="training-run-001",
    arguments={
        "dataset_url": "gs://my-bucket/data.csv",
        "n_estimators": 200,
        "max_depth": 8,
        "accuracy_threshold": 0.90
    }
)

print(f"Run ID: {run.run_id}")
print(f"Run URL: http://localhost:8080/#/runs/details/{run.run_id}")
Recurring Run
# Run daily at 2 AM
client.create_recurring_run(
    experiment_id=experiment.experiment_id,
    job_name="daily-retraining",
    pipeline_func=ml_training_pipeline,
    cron_expression="0 2 * * *",
    max_concurrency=1,
    arguments={
        "dataset_url": "gs://my-bucket/latest-data.csv",
        "accuracy_threshold": 0.85
    }
)
Advanced Patterns
Parallel Execution (ParallelFor)
@dsl.pipeline(name="Hyperparameter Search")
def hp_search_pipeline():
    # Define hyperparameter combinations
    hp_configs = [
        {"n_estimators": 100, "max_depth": 4, "lr": 0.1},
        {"n_estimators": 200, "max_depth": 6, "lr": 0.05},
        {"n_estimators": 300, "max_depth": 8, "lr": 0.01},
    ]

    # Parallel training
    with dsl.ParallelFor(hp_configs) as config:
        train_task = train_model(
            train_dataset=load_task.outputs["output_dataset"],
            n_estimators=config.n_estimators,
            max_depth=config.max_depth,
            learning_rate=config.lr
        )
Caching
# Disable caching at the component level
load_task = load_data(dataset_url=dataset_url)
load_task.set_caching_options(False)  # Always re-execute

# Configure caching at the pipeline level
run = client.create_run_from_pipeline_func(
    ml_training_pipeline,
    enable_caching=True  # Use cache for identical inputs
)
Volume Mounts
@dsl.component(base_image="python:3.11-slim")
def process_large_data(output_data: Output[Dataset]):
    """Process large datasets"""
    pass

# PVC mount
process_task = process_large_data()
process_task.add_pvolumes({
    "/mnt/data": dsl.PipelineVolume(pvc="data-pvc")
})
CI/CD Integration
GitHub Actions + KFP
# .github/workflows/ml-pipeline.yml
name: ML Pipeline CI/CD

on:
  push:
    branches: [main]
    paths:
      - 'pipelines/**'
      - 'components/**'

jobs:
  deploy-pipeline:
    runs-on: ubuntu-latest
    steps:
      - uses: actions/checkout@v4

      - name: Set up Python
        uses: actions/setup-python@v5
        with:
          python-version: '3.11'

      - name: Install dependencies
        run: pip install kfp==2.7.0

      - name: Compile pipeline
        run: python pipelines/compile.py

      - name: Upload and run pipeline
        env:
          KFP_HOST: ${{ secrets.KFP_HOST }}
        run: |
          python -c "
          from kfp.client import Client
          client = Client(host='$KFP_HOST')
          client.upload_pipeline(
            pipeline_package_path='ml_pipeline.yaml',
            pipeline_name='ml-training-v2',
            description='Automated ML training pipeline'
          )
          "
What Compilation Actually Produces
Versions first. From this section onward the API is based on kfp SDK 2.17.0, used together with kfp-kubernetes 2.17.0 and kfp-server-api 2.17.0. It needs Python 3.9 or later, and it is not the 2.7.0 from the installation block above. When an example you found does not run as written, nine times out of ten it is an SDK version difference.
The API reference describes Compiler as compiling a pipeline authored in the KFP SDK DSL into a YAML pipeline definition, and it nails package_path down as the output YAML file path. In v2 the compilation output is always a single YAML file.
from kfp import compiler

compiler.Compiler().compile(
    pipeline_func=ml_training_pipeline,
    package_path="ml_pipeline.yaml",  # the docs' own wording: "output YAML file path"
    pipeline_name="ml-training",
    pipeline_display_name="ML Training Pipeline",
    pipeline_parameters={"n_estimators": 200},
    type_check=True,
)
# Remaining arguments: kubernetes_manifest_options, kubernetes_manifest_format
# Note: kfp_package_path belongs to @dsl.component, not to compile()
Compilation touches neither the cluster nor the backend. That is exactly why it should be the first check you run in CI. A miswired task or a type that does not line up gets caught here. If you want the CI step to be one line, the CLI is easier.
kfp dsl compile --py my_pipeline.py --output my_pipeline.yaml
kfp_package_path looks like a compile option, which is where many people lose time. For arguments whose purpose is not obvious from the name alone, such as kubernetes_manifest_options, check the exact API in the docs for the version you are using.
Submitting a Run and Reading It
There are two paths for sending work up. create_run_from_pipeline_func takes the pipeline function and compiles it internally, while create_run_from_pipeline_package takes a YAML you built beforehand. The argument sets are the same. In practice the latter is the one to use: a single YAML built in CI can go up to staging and production unchanged.
from kfp.client import Client

client = Client(host="http://localhost:8080", namespace="kubeflow")
experiment = client.create_experiment(name="ml-experiments")

# Arguments common to both functions: arguments, run_name, experiment_name, namespace,
#   pipeline_root, enable_caching, cache_key, service_account, experiment_id
run = client.create_run_from_pipeline_package(
    pipeline_file="ml_pipeline.yaml",
    arguments={"n_estimators": 200, "accuracy_threshold": 0.90},
    run_name="training-run-001",
    experiment_id=experiment.experiment_id,
    enable_caching=True,
)

# In CI you have to block here so success or failure reaches the exit code
client.wait_for_run_completion(run.run_id, timeout=3600, sleep_duration=5)

# Registering in the catalog and bumping the version
client.upload_pipeline("ml_pipeline.yaml", pipeline_name="ml-training-v2")
client.upload_pipeline_version("ml_pipeline.yaml", "v3", pipeline_name="ml-training-v2")

# A recurring run points at a package or a registered pipeline, not at a function
client.create_recurring_run(
    experiment_id=experiment.experiment_id,
    job_name="daily-retraining",
    pipeline_package_path="ml_pipeline.yaml",  # or pipeline_id / version_id
    cron_expression="0 2 * * *",
    max_concurrency=1,
    no_catchup=True,      # after downtime, do not fire every missed schedule at once
    params={"accuracy_threshold": 0.85},
)
The default namespace on Client is kubeflow, and list_runs has a default page_size of 10, so you only get ten rows back.
Recurring runs come with a trap. The earlier example passes pipeline_func to create_recurring_run, but the confirmed signature has no such argument. It has to point at a compiled package or a registered pipeline ID, not at a function.
Once a run starts, one node in the graph is one task, and one task is one Pod. Click a node and you see logs, input and output artifacts, and whether the cache was hit. Pod naming rules and labels differ by deployment method, so check the docs for the deployment you are running.
Running It End to End Once
The examples above need an external CSV and XGBoost, which makes them hard to run as-is. Here we build a minimum pipeline you can copy and submit immediately. The point is to get through the path from compile to submit to artifacts appearing in the UI exactly once.
from typing import NamedTuple

from kfp import compiler, dsl
from kfp.client import Client


@dsl.component(base_image="python:3.11")
def make_split(n_rows: int, ratio: float) -> NamedTuple('outputs', train=int, test=int):
    from typing import NamedTuple

    outputs = NamedTuple('outputs', train=int, test=int)
    n_test = int(n_rows * ratio)
    return outputs(n_rows - n_test, n_test)


@dsl.component(base_image="python:3.11", packages_to_install=["scikit-learn==1.4.0"])
def fit_and_score(
    train_rows: int,
    model: dsl.Output[dsl.Model],
    metrics: dsl.Output[dsl.Metrics],
):
    import json

    from sklearn.dummy import DummyClassifier

    X = [[0], [1]] * train_rows
    y = [0, 1] * train_rows

    clf = DummyClassifier(strategy="most_frequent")
    clf.fit(X, y)
    accuracy = float(clf.score(X, y))

    with open(model.path, "w") as f:
        json.dump({"strategy": "most_frequent"}, f)
    model.metadata["framework"] = "sklearn"
    metrics.log_metric("accuracy", accuracy)


@dsl.pipeline(name="smoke-pipeline", description="compile to submit smoke test")
def smoke_pipeline(n_rows: int = 1000, ratio: float = 0.2):
    split = make_split(n_rows=n_rows, ratio=ratio)

    fit = fit_and_score(train_rows=split.outputs["train"])
    fit.set_memory_request("512Mi")
    fit.set_memory_limit("1Gi")
    fit.set_retry(num_retries=2)


compiler.Compiler().compile(smoke_pipeline, package_path="smoke_pipeline.yaml")

client = Client(host="http://localhost:8080")
run = client.create_run_from_pipeline_package(
    "smoke_pipeline.yaml",
    arguments={"n_rows": 1000},
    run_name="smoke-001",
    experiment_name="smoke",
)
print(run.run_id)
client.wait_for_run_completion(run.run_id, timeout=900)

# Parameter mapping: str -> string, int/float -> number, bool -> boolean,
#                    list/dict -> object
# Artifact types: dsl.Artifact(system.Artifact), Dataset, Model, Metrics,
#   ClassificationMetrics, SlicedClassificationMetrics, HTML, Markdown
#   Shared properties .name .uri .path .metadata / Model adds .framework
# Metrics.log_metric(metric, value)
# ClassificationMetrics.log_roc_data_point(fpr, tpr, threshold), log_roc_curve(),
#   set_confusion_matrix_categories(), log_confusion_matrix_row(),
#   log_confusion_matrix_cell(), log_confusion_matrix(categories, matrix)
# dsl.InputPath / dsl.OutputPath are mainly for Container Components, while
#   Python Components do the same job through return type annotations
Run it and you get roughly this shape. Strings and UI placement differ by backend version, so just check that each item is there.
1) Compilation output
   smoke_pipeline.yaml          <- a single file, that is all

2) Standard output right after submission
   the run ID is printed as one UUID line

3) The graph on the run detail screen in the UI
   make_split       Succeeded
   fit_and_score    Succeeded
     Metrics   tab : accuracy = 0.5
     Artifacts tab : model (system.Model), metadata.framework = sklearn

4) Submit once more with the same arguments
   make_split       Succeeded  (marked as a cache hit)
   fit_and_score    Succeeded  (marked as a cache hit)
   -> the run time drops to a few seconds
When you are vetting a new cluster, two questions are enough: does the first run succeed, and is the second one faster. Both together are the signal that the backend and artifact storage are wired up.
A component with multiple outputs is declared with NamedTuple and read in the next task through task.outputs['<output-key>']. Redefining NamedTuple inside the function body looks like awkward code, but it is required, and the next section explains why.
Small values are serialized as parameters, while large things like models and datasets become artifacts. The per-type mapping and the method names are in the comments at the end of the code above. One worth calling out: the method for logging an ROC point is log_roc_data_point, and log_roc_reading, which shows up in examples now and then, is not a real name.
Components Are Far More Isolated Than You Think
This is the most-stepped-on trap. The docs state two constraints on Python components. The function's inputs and outputs must carry valid KFP type annotations, and the function may not reference any symbol defined outside its own body.
The second one is the real one. The decorator lifts the function source out and runs it standalone inside a container, so neither the import at the top of the module nor a constant defined elsewhere in the file exists inside that container.
# Does not work - references symbols outside the body
import pandas as pd

TARGET_COLUMN = "label"


@dsl.component(base_image="python:3.11")
def bad_component(data: dsl.Input[dsl.Dataset]) -> int:
    df = pd.read_csv(data.path)                # NameError: name 'pd' is not defined
    return int(df[TARGET_COLUMN].nunique())    # NameError: name 'TARGET_COLUMN' ...


# Works - every symbol lives inside the body
@dsl.component(base_image="python:3.11", packages_to_install=["pandas==2.1.4"])
def good_component(data: dsl.Input[dsl.Dataset], target_column: str = "label") -> int:
    import pandas as pd

    df = pd.read_csv(data.path)
    return int(df[target_column].nunique())
What makes it nasty is that compilation passes. The YAML gets built, the run even starts, and then it dies on the cluster with a NameError. One review rule covers it: the first line of a component function should be an import, and if a name appears in the body that is not in the signature, send it back.
packages_to_install has a price of its own. The docs explain that this list is installed every time the task runs. Run it 100 times and pip install runs 100 times too. The alternative is Containerized Python Components, which bake dependencies into the image at build time.
# Build the image only, do not push (for local checking)
kfp component build src/ --component-filepattern my_component.py --no-push-image

# Push all the way to the registry (the form used in CI)
kfp component build src/ --component-filepattern my_component.py --push-image
The default base_image is python:3.11 according to the Containerized Python Components docs. The Lightweight Python Components page, however, still says python:3.7, so the two pages disagree — always state it explicitly. On an air-gapped network you will also need pip_index_urls, pip_trusted_hosts, install_kfp_package and use_venv.
The Order to Read a Failed Run In
When a run turns red, do not skim the UI. Go in order: find the failed node, read only the last 30 lines of the log, and separate a Python exception from a Pod that never came up.
- NameError or ModuleNotFoundError — either the isolation rule was broken or a package is missing. Passing compilation means nothing here.
- The next task cannot find its input — you wrote directly to
.uri. In the docs' own words,.uriis where the artifact actually lives in storage while.pathprovides convenient local filesystem access. Code writes to.path. - The Pod will not move out of Pending — request is the scheduling criterion, limit is the ceiling. Set only request high and it stays Pending forever, which shows up in Kubernetes events.
- A GPU task comes up without a GPU — check whether you set both
set_accelerator_typeandset_accelerator_limit.set_gpu_limitis not in the current reference. - The image could not be pulled — this is ordinary Kubernetes behavior rather than KFP, so look at the cluster-side docs.
- It finished instantly — that is not a failure, it is a cache hit.
Retries are set_retry(num_retries, backoff_duration=None), and cleanup work that should proceed even when an upstream step failed is ignore_upstream_failure(). To react to overall success or failure, combine dsl.ExitHandler with dsl.PipelineTaskFinalStatus, where state is one of SUCCEEDED, FAILED or CANCELLED.
@dsl.component(base_image="python:3.11")
def notify(status: dsl.PipelineTaskFinalStatus):
    print("state:", status.state)
    if status.state == "FAILED":
        print("pipeline failed - send alert here")


@dsl.pipeline(name="pipeline-with-exit-handler")
def pipeline_with_exit_handler(n_rows: int = 1000):
    with dsl.ExitHandler(exit_task=notify()):
        split = make_split(n_rows=n_rows, ratio=0.2)

        fit = fit_and_score(train_rows=split.outputs["train"])
        fit.set_retry(num_retries=2)
This is what stops nightly retraining from failing quietly. The format backoff_duration accepts could not be confirmed, so check the exact API in the docs for the version you are using.
Caching Is On by Default
The docs state that caching is enabled by default for every component. You are not turning it on; it is already on, and you turn it off when you need to.
The setting lives at three levels. Per task it is set_caching_options(False), per run it is enable_caching, and the run level overrides the task level. If a component you disabled caching on still hits the cache, look at the run arguments.
# 1) Task level - always re-run just this task
load_task = load_data(dataset_url=dataset_url)
load_task.set_caching_options(False)

# 2) Run level - overrides the task-level setting
run = client.create_run_from_pipeline_func(
    ml_training_pipeline,
    arguments={"dataset_url": "gs://my-bucket/data.csv"},
    enable_caching=False,
)
The third level is global. A compile flag or an environment variable can turn the default itself off, and the environment variable only takes effect if it is set before the components are imported.
# Turn the default off with a compile flag
kfp dsl compile --py my_pipeline.py --output my_pipeline.yaml \
  --disable-execution-caching-by-default

# Or with an environment variable (must be set before importing the components)
export KFP_DISABLE_EXECUTION_CACHING_BY_DEFAULT=true
python my_pipeline.py
When the cache hits, a green cloud-arrow icon appears in the UI.
From here on this is inference, not documentation. The components of the cache key are not documented, so nothing can be stated firmly. Still, given the observation that identical components and identical inputs return the previous outputs, surprises usually mean that the thing that changed sits outside the cache key. Data in an external bucket quietly refreshed, or an image behind a floating tag like latest swapped underneath you, are the classic cases. When in doubt, turn caching off for that one task and compare.
Control Flow and Platform Features Have Been Renamed
When porting old code, the first name to check is dsl.Condition. The docs state that it is deprecated, replaced by the functionally identical dsl.If. The pipeline above already uses dsl.If, but early v2 code in your internal repositories will still have it.
Branching is completed with dsl.If, dsl.Elif and dsl.Else, and when several branches feed one downstream input you use dsl.OneOf, which requires a dsl.Else branch to be present. The argument most easily missed in parallel execution is parallelism in dsl.ParallelFor(items, name=None, parallelism=None). Fan out without it and as many Pods as there are combinations come up at once, and on a small cluster they all end up Pending. To gather fan-out results, use dsl.Collected.
@dsl.pipeline(name="control-flow-example")
def control_flow_example(threshold: float = 0.85):
    # train_with_epochs, max_accuracy, promote_model, stage_model and
    # report_failure are assumed to be components you defined yourself

    # parallelism caps how many Pods come up at the same time
    with dsl.ParallelFor(items=[1, 5, 10, 25], parallelism=2) as epochs:
        train_task = train_with_epochs(epochs=epochs)

    # Gather the fanned-out results into one
    best = max_accuracy(models=dsl.Collected(train_task.outputs["model"]))

    with dsl.If(best.output >= threshold):
        promote_model(score=best.output)
    with dsl.Elif(best.output >= 0.70):
        stage_model(score=best.output)
    with dsl.Else():
        report_failure(score=best.output)

# Confirmed methods on PipelineTask (all of them chain)
#   set_cpu_request, set_cpu_limit, set_memory_request, set_memory_limit,
#   set_accelerator_type, set_accelerator_limit, set_caching_options,
#   set_retry, set_env_variable, ignore_upstream_failure, after
#   set_gpu_limit is not in the current API reference
Volumes live in a separate package. The add_pvolumes and dsl.PipelineVolume in the volume mount example above are KFP v1-era notation; the confirmed v2 path is kfp-kubernetes, installed with pip install kfp[kubernetes].
from kfp import dsl, kubernetes


@dsl.pipeline(name="pvc-example")
def pvc_example():
    pvc1 = kubernetes.CreatePVC(
        pvc_name_suffix='-my-pvc',
        access_modes=['ReadWriteMany'],
        size='5Gi',
        storage_class_name='standard',
    )

    task1 = producer()
    kubernetes.mount_pvc(task1, pvc_name=pvc1.outputs['name'], mount_path='/data')

    task2 = consumer().after(task1)
    kubernetes.mount_pvc(task2, pvc_name=pvc1.outputs['name'], mount_path='/data')

    # Finish the cleanup inside the pipeline as well
    kubernetes.DeletePVC(pvc_name=pvc1.outputs['name']).after(task2)


# Other confirmed features in the same package
#   use_secret_as_env, use_secret_as_volume, use_config_map_as_env,
#   use_config_map_as_volume, add_ephemeral_volume, add_pod_label,
#   add_pod_annotation, use_field_path_as_env, set_timeout,
#   set_image_pull_policy, set_security_context, set_image_pull_secrets
The function names for things frequently needed on GPU clusters, such as node selection or taint tolerations, could not be confirmed, so check the exact API in the docs for the version you are using.
When Not to Use KFP
KFP is not a lightweight tool. Running a single pipeline requires a Kubernetes cluster, the KFP backend and object storage to all be alive. Attach it to work that does not need the reproducibility and lineage tracking you pay for, and all that is left is the cost.
- Work that a single Python script finishes — the moment you split it into components, data between steps is serialized and makes a round trip to storage. For a job that takes a few seconds, the overhead is bigger than the job.
- Running the same thing at a fixed time and nothing more — if you never need to look at lineage, cron or a Kubernetes CronJob is enough.
- Nobody around who can read Kubernetes — most KFP failures come from Kubernetes. Without someone who can read the cluster, debugging turns into fortune telling.
- The team has already settled on another orchestrator — calling the training job from the existing tool is usually cheaper.
- Still in the exploration phase — the moment you have to build an image or wait on pip install every time, your iteration speed collapses.
Conversely, the point where KFP earns its keep is narrow and clear: when several people run the same training and get different results, and when you have to trace back which data a model from three months ago was built from.
Conclusion
Kubeflow Pipelines v2 key takeaways:
- @dsl.component: Converts Python functions into containerized components
- @dsl.pipeline: Connects components into a DAG
- Artifact System: Manages inputs/outputs with typed artifacts like Dataset, Model, and Metrics
- Conditionals/Loops: Dynamic pipelines with dsl.If and dsl.ParallelFor
- Caching: Cost reduction by skipping re-execution for identical inputs
What actually eats your time is not these five, but the isolation rule and the caching that is on by default.
References
The same thing is sometimes written differently from one page to the next; when that happens, the readthedocs side is closer to the actual signature.
- dsl - checked 2026-08-16.
- compiler - checked 2026-08-16.
- client - checked 2026-08-16.
- Containerized Python Components - checked 2026-08-16.
- Artifacts - checked 2026-08-16.
- Control flow - checked 2026-08-16.
- Caching - checked 2026-08-16.
- Platform-specific features - checked 2026-08-16.
Quiz (6 Questions)
Q1. What is the decorator used to define a component in KFP v2? @dsl.component
Q2. What is the difference between Output[Dataset] and Output[Model]? They are type hints that distinguish artifact types. Dataset is for data artifacts, and Model is for trained model artifacts.
Q3. How do you implement conditional execution in a pipeline? Use the dsl.If context manager (e.g., with dsl.If(accuracy >= threshold))
Q4. What happens when you run with identical inputs while caching is enabled? The component is skipped and the previous execution results are reused.
Q5. What is ParallelFor used for? Running the same component in parallel with different parameters (e.g., hyperparameter search)
Q6. What is the biggest change when migrating from KFP v1 to v2? Using @dsl.component decorator instead of ContainerOp, and the introduction of the Artifact type system.
Quiz
Q1: What is the main topic covered in "Kubeflow Pipelines v2 Practical Guide — Building ML
Pipelines with KFP SDK"?
A practical guide to building ML pipelines with the KFP SDK in Kubeflow Pipelines v2. Covers component definitions, pipeline authoring, artifact management, and Kubernetes deployment with a code-first approach.
Q2: What are the key steps for KFP v2 Installation and Core Concepts?
Installation Core Concepts
Q3: Explain the core concept of Defining Components.
Lightweight Python Component Custom Docker Image Component
Q4: What are the key aspects of Authoring Pipelines?
Basic Pipeline Pipeline Compilation and Execution Recurring Run
Q5: How does Advanced Patterns work?
Parallel Execution (ParallelFor) Caching Volume Mounts