
This post is a study note based on the Udemy course https://www.udemy.com/course/certified-kubernetes-administrator-with-practice-tests and content from https://kodekloud.com/.
121 OS Upgrades
What happens in Kubernetes when one of the Worker Nodes goes down? According to the pod eviction timeout (default 5 minutes), if a node remains down beyond that threshold, it is treated as a dead node. If the node comes back up before 5 minutes, the pods are recovered.
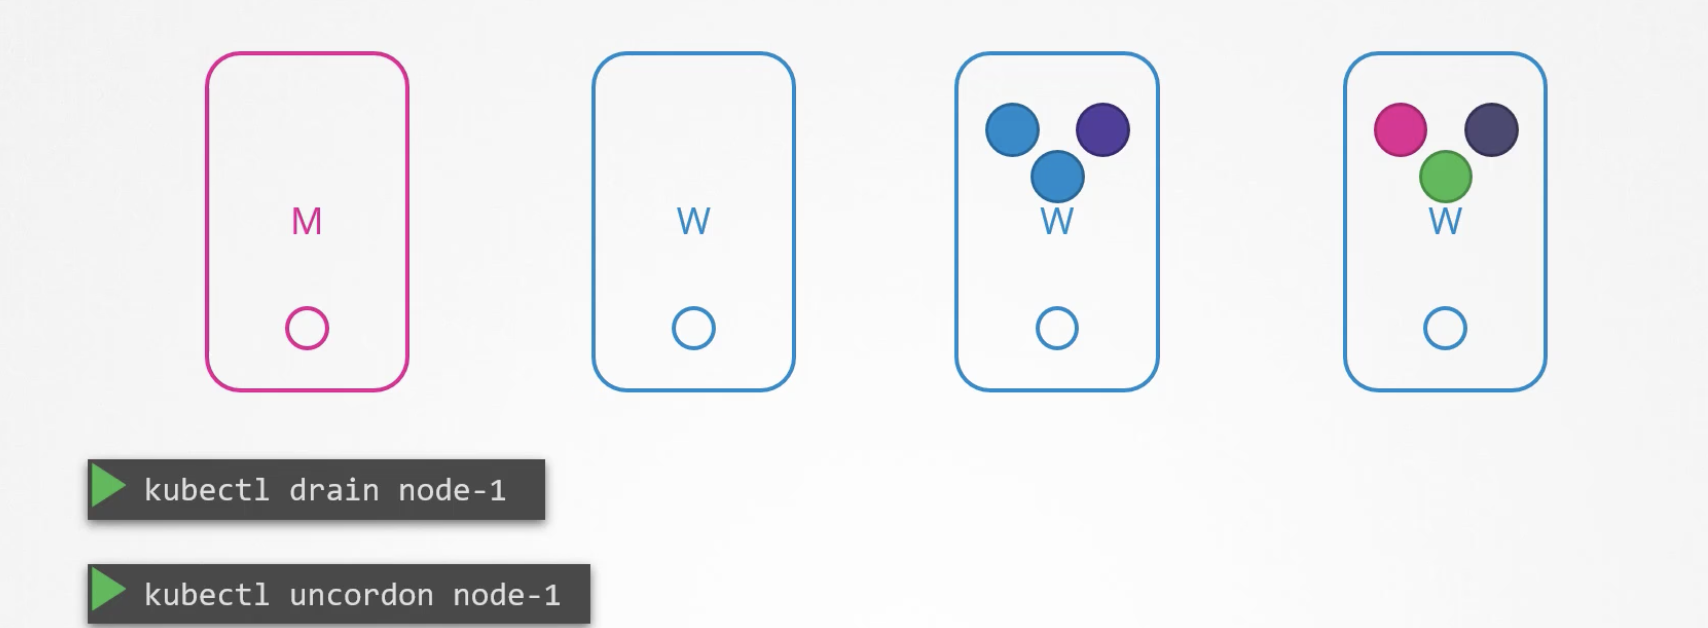
If you need to stop a node for hardware maintenance or an OS restart, you can migrate the running pods to other nodes beforehand. There is also a concept called cordon -- when you cordon a node in Kubernetes, the scheduler will no longer assign pods to that node. Once cordon and drain are complete, the node no longer affects the Kubernetes cluster, making it ready for maintenance.
$ kubectl drain <node_name>
Once the worker node is back up, use uncordon to make it schedulable again.
126 Cluster Upgrade Process
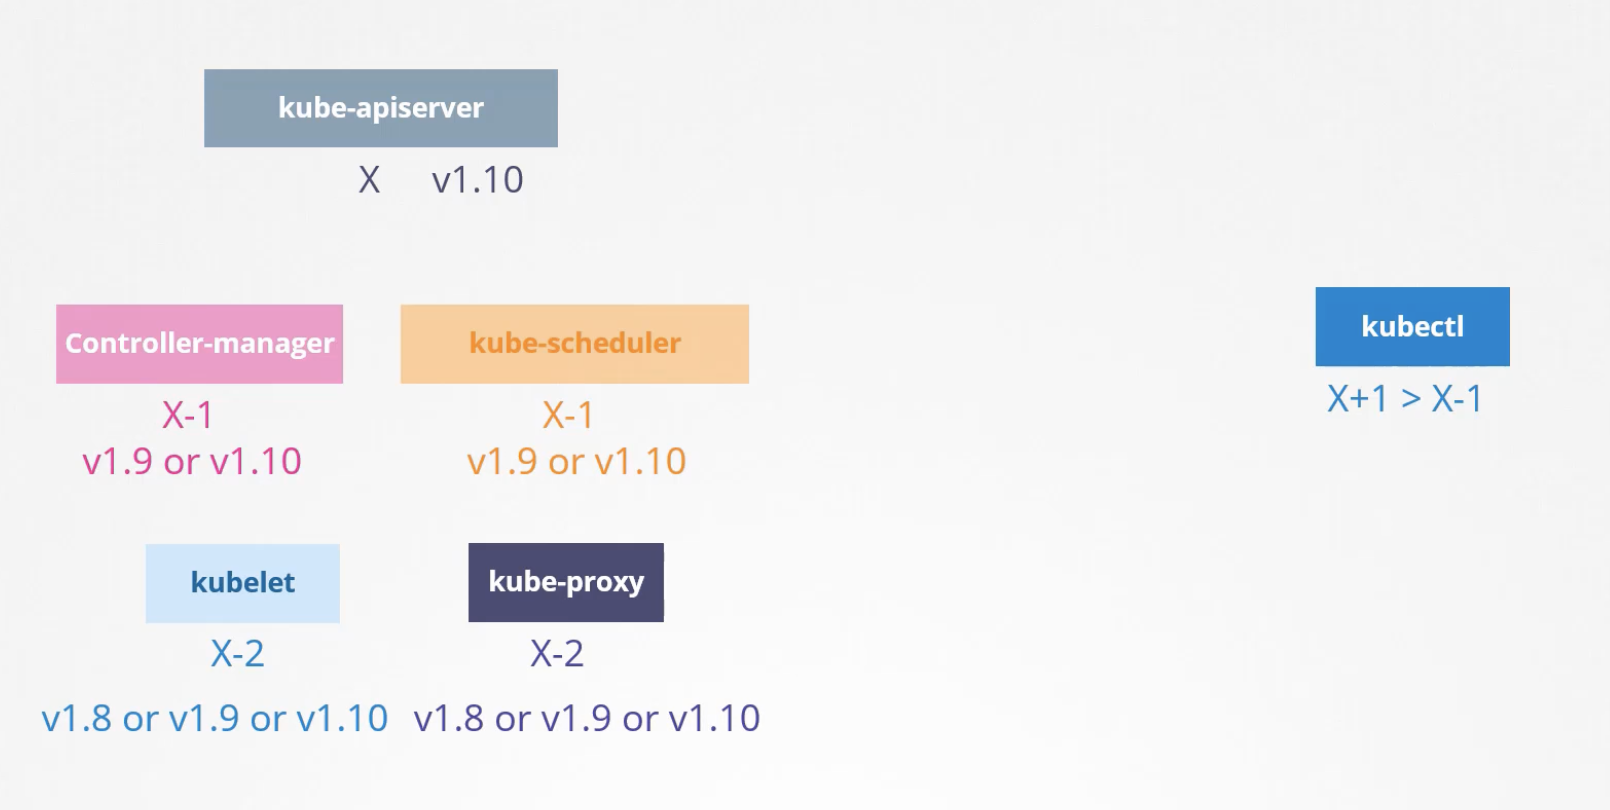
Upgrading Kubernetes requires upgrading various software components together, and the target version is determined based on the kube-apiserver version. Except for kubectl, no component can have a version higher than the kube-apiserver. Also, upgrades cannot skip multiple minor versions at once -- you must upgrade one minor version at a time.
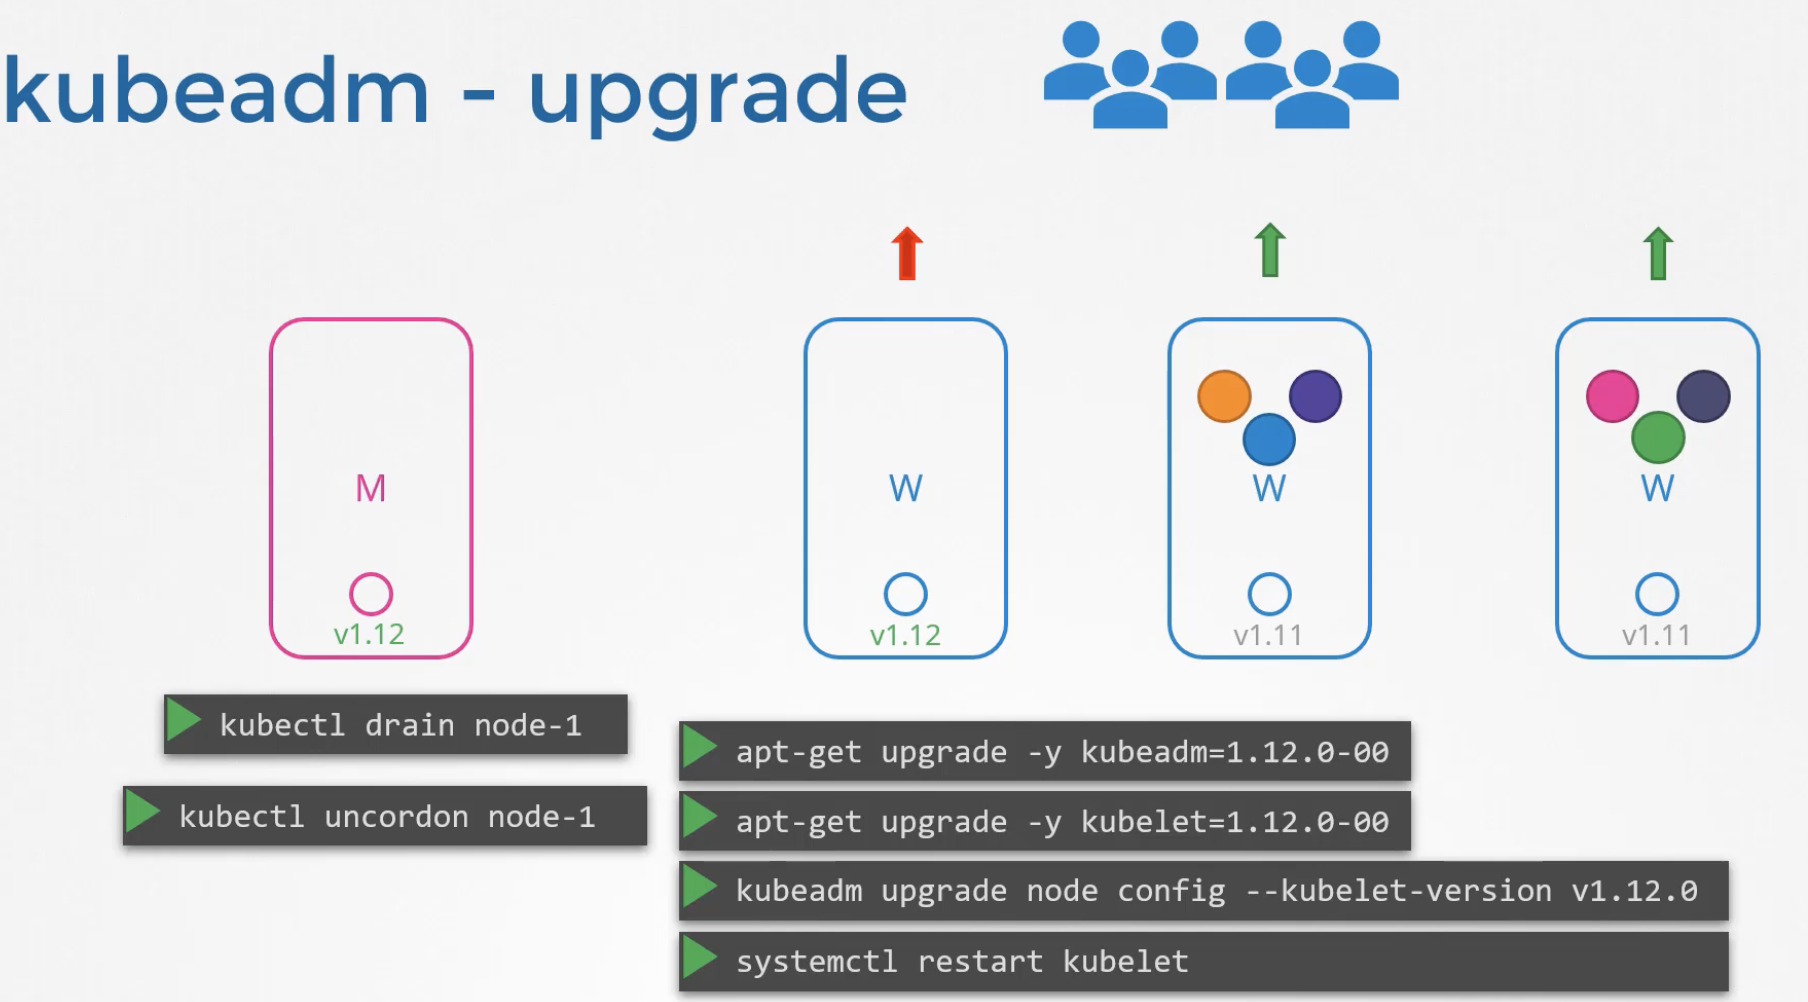
An upgrade consists of two major steps. The first is the Master Node upgrade, and the second is the Worker Node upgrade. Temporarily bringing down the Master Node for the upgrade has minimal impact on pods, so it is not a concern. The Worker Node upgrade can be more problematic, and there are three strategies:
- Stop all worker nodes, perform the kubectl upgrade, then start all worker nodes.
- Upgrade worker nodes one at a time.
- Add new worker nodes with the new version while removing the old ones.
Running kubeadm upgrade plan displays information needed for the master node upgrade. However, kubeadm does not support upgrading the kubelet. To upgrade Kubernetes, you also need to upgrade the kubeadm tool to match the version.
130. Backup and Restore Methods
Resource configurations written declaratively as YAML files can be stored and managed in places like GitHub. Even if the entire cluster goes down, you can recover by applying these configurations. However, if any pods were created imperatively, that information will not be recoverable.
The following command exports the configurations of all currently running resources into a single YAML file.
kubectl get all --all-namespace -o yaml > all-deploy-services.yaml
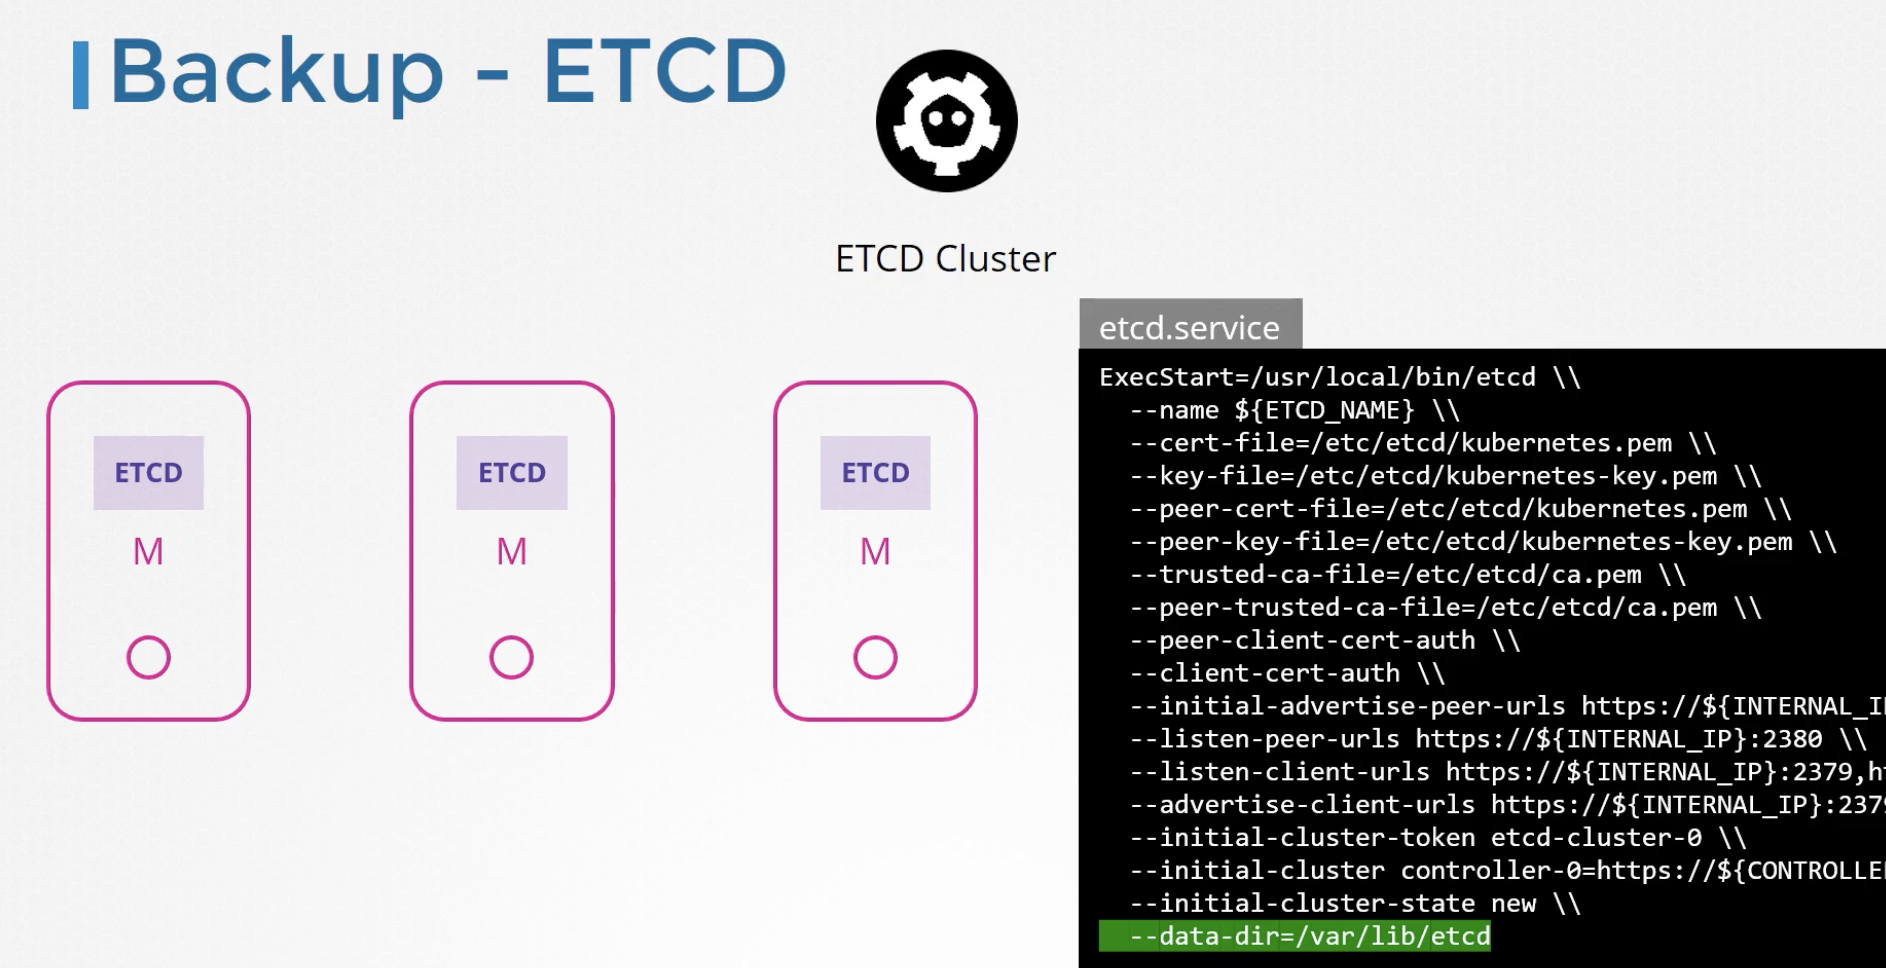
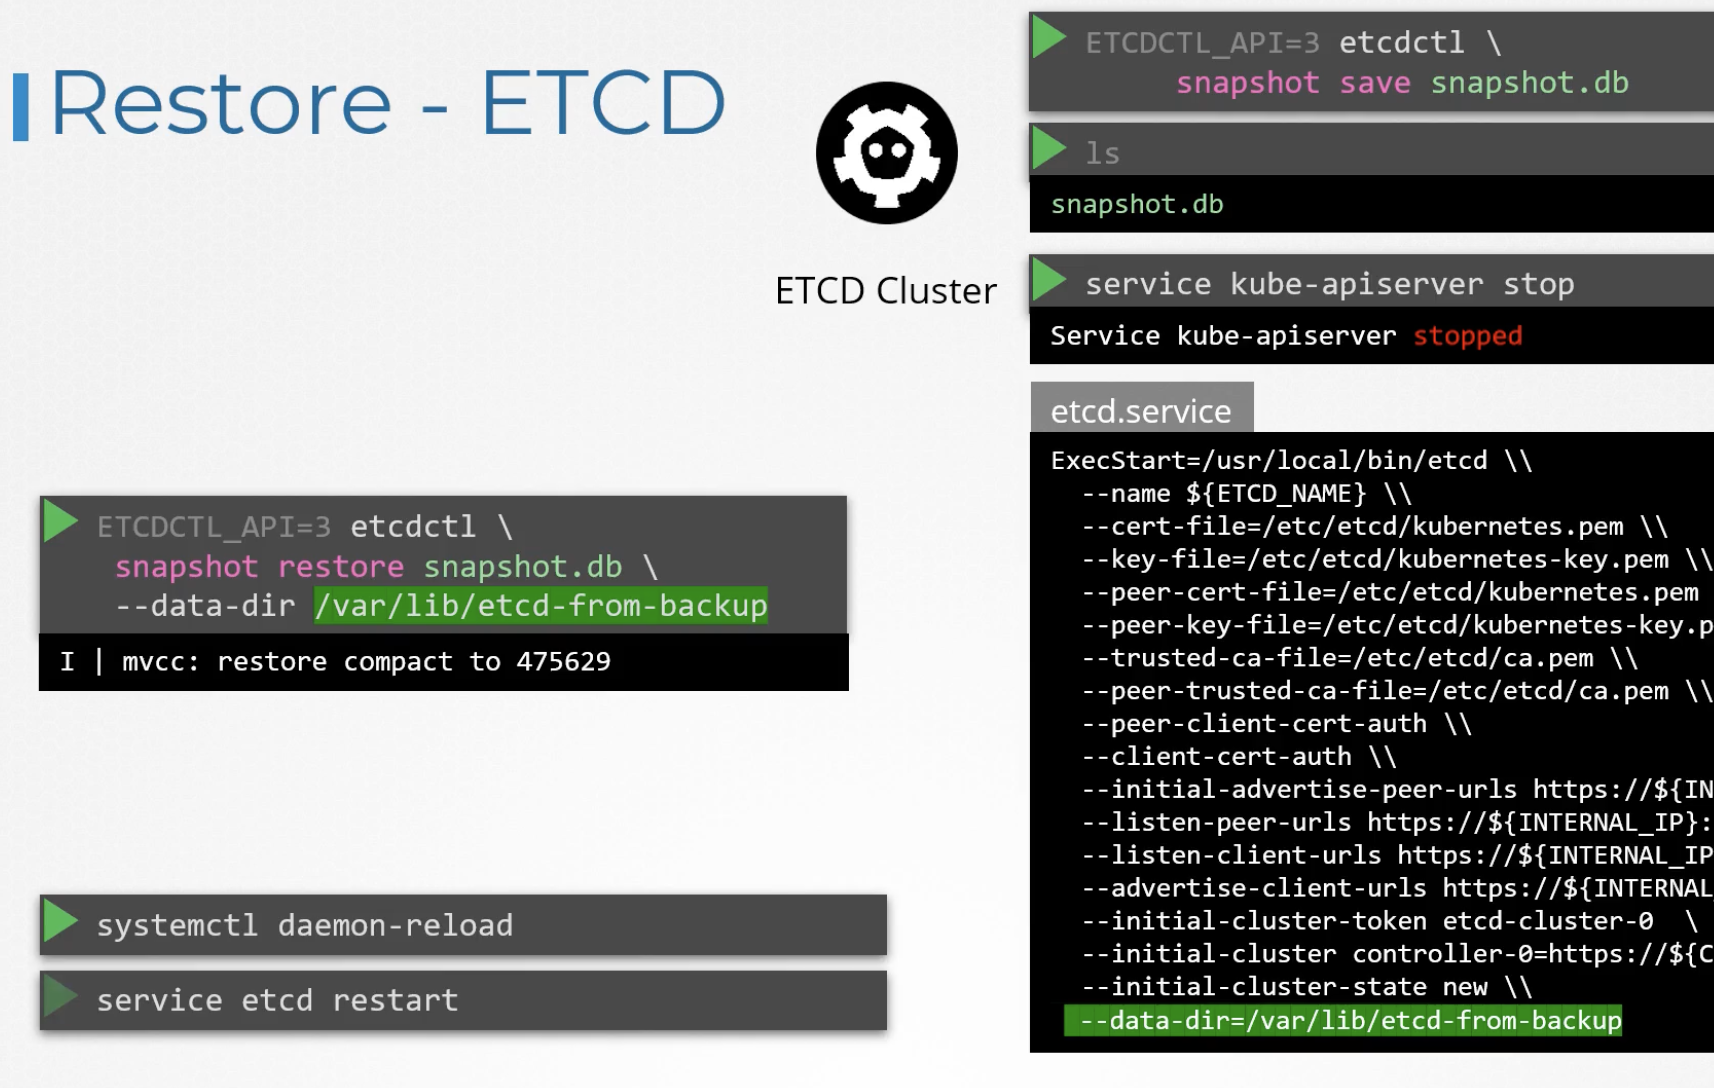
Since the ETCD cluster also stores data, you can back up ETCD data in snapshot format using the etcdctl snapshot save <filename> command.
ETCDTCL_API=3 etcdctl snapshot save snapshot.db
Set the etcd API version to 3 for CLI commands by running export ETCDCTL_API=3. To restore, first stop the API server with service kube-apiserver stop, then restore the snapshot with etcdctl snapshot restore snapshot.db --data-dir /var/lib/etcd-fron-backup, followed by systemctl daemon-reload and service ectc restart to restart etcd. Finally, restart the kube-apiserver with service kube-apiserver start to complete the restore process.
If TLS security is configured on the ETCD database, the following arguments must also be passed when executing etcdctl commands.
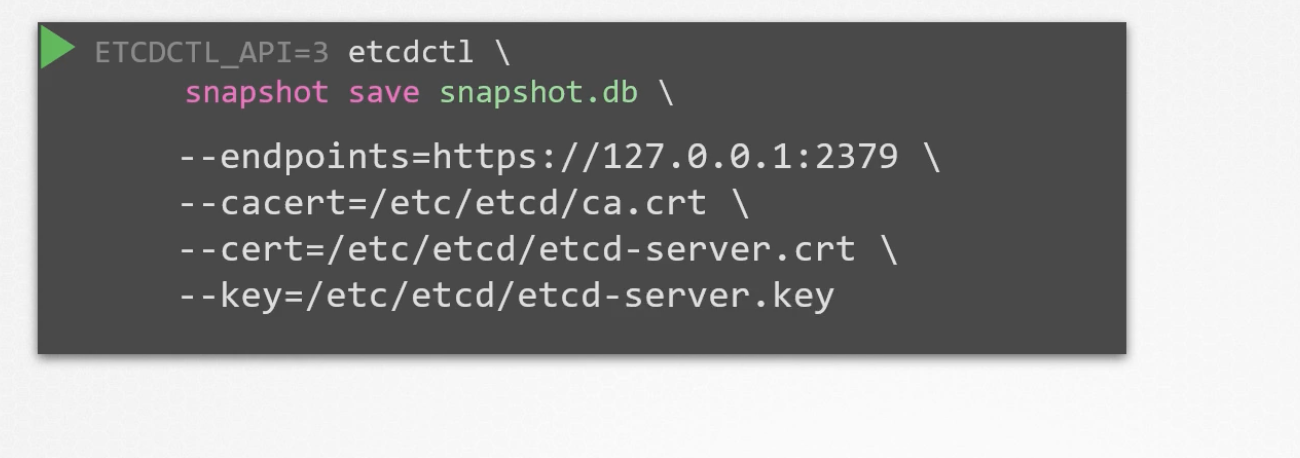
- cacert
- cert
- endpoints
- key
    Command:
      etcd
      --advertise-client-urls=https://192.10.124.9:2379
      --cert-file=/etc/kubernetes/pki/etcd/server.crt
      --client-cert-auth=true
      --data-dir=/var/lib/etcd
      --experimental-initial-corrupt-check=true
      --experimental-watch-progress-notify-interval=5s
      --initial-advertise-peer-urls=https://192.10.124.9:2380
      --initial-cluster=controlplane=https://192.10.124.9:2380
      --key-file=/etc/kubernetes/pki/etcd/server.key
      --listen-client-urls=https://127.0.0.1:2379,https://192.10.124.9:2379
      --listen-metrics-urls=http://127.0.0.1:2381
      --listen-peer-urls=https://192.10.124.9:2380
      --name=controlplane
      --peer-cert-file=/etc/kubernetes/pki/etcd/peer.crt
      --peer-client-cert-auth=true
      --peer-key-file=/etc/kubernetes/pki/etcd/peer.key
      --peer-trusted-ca-file=/etc/kubernetes/pki/etcd/ca.crt
      --snapshot-count=10000
      --trusted-ca-file=/etc/kubernetes/pki/etcd/ca.crt
$ ETCDTCL_API=3 etcdctl snapshot save /opt/snapshot-pre-boot.db --endpoints=https://127.0.0.1:2379 --cert=/etc/kubernetes/pki/etcd/server.crt --cacert=/etc/kubernetes/pki/etcd/ca.crt --key=/etc/kubernetes/pki/etcd/server.key
Snapshot saved at /opt/snapshot-pre-boot.db
$ ETCDTCL_API=3 etcdctl snapshot restore --data-dir /var/lib/etcd-from-backup /opt/snapshot-pre-boot.db 2023-12-20 01:21:08.126263 I | mvcc: restore compact to 9192023-12-20 01:21:08.143486 I | etcdserver/membership: added member 8e9e05c52164694d [http://localhost:2380] to cluster cdf818194e3a8c32
In the etcd static Pod definition, set the HostPath to the data directory path. Once the configuration is complete, etcd will be temporarily stopped, making the cluster inaccessible. However, once the etcd database is running normally again, cluster access will be restored.
  - hostPath:
      path: /var/lib/etcd-from-backup
      type: DirectoryOrCreate
    name: etcd-data
In a multi-cluster environment where information about multiple clusters is registered, you can check them with the following command.
$ kubectl config get-clusters
NAME
cluster1
cluster2
To switch the cluster context, use kubectl config use-context cluster2.
Quiz
Q1: What is the main topic covered in "CKA_6_Cluster_Maintenance"?
CKA_6_Cluster_Maintenance
Q2: What are the key takeaways from this article?
CKA_6_Cluster_Maintenance
Q3: How can the concepts in this article be applied in practice?
Consider the practical examples and patterns discussed throughout the post.